

Most travel advice starts at the airport. By then, half your decisions are already locked in — and some of them may be wrong. The difference between a trip that runs smooth and one that falls apart in the first 24 hours usually comes down to what you did (or didn’t do) in the two weeks before departure.
This guide covers the complete international travel checklist: documents, money, health, gear, connectivity, and the smart pre-trip habits that experienced travelers build into every trip. Whether it’s your first time abroad or your fiftieth, something here is probably worth double-checking.
How to Use This Checklist
This checklist is organized by timeline — what to handle 6+ weeks out, what to do 2 weeks before, and what to confirm in the final 48 hours. Work through it in order. Some items (passport validity, visa requirements) have long lead times that catch travelers completely off guard.
6+ Weeks Before Departure: The Big Decisions
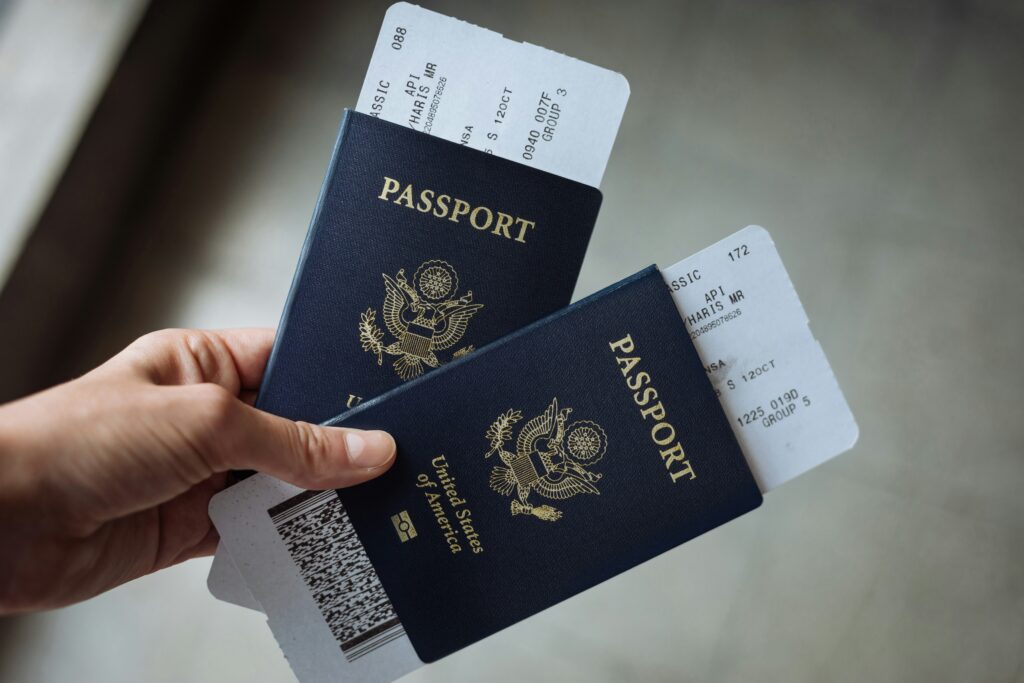
1. Check Your Passport — Really Check It
Your passport is valid. That much you know. What most travelers miss is that many countries require your passport to be valid for 6 months beyond your return date. Show up to the gate for Costa Rica, the Philippines, or Indonesia with 4 months of validity and you may get turned around before you even board.
Check your passport right now. If it expires within 8 months, get a renewal started. Routine U.S. passport renewals are currently running 6–8 weeks. Expedited service costs more but gets you there in 2–3 weeks. If you’re truly in a bind, an in-person appointment at a passport agency can get it done in days, but appointments are hard to come by.
2. Visa Research — Don’t Assume
U.S. passport holders get visa-free or visa-on-arrival access to a large chunk of the world, but that list has gaps that surprise people. Brazil, India, Russia, China, Vietnam, and many others require advance visas. Even countries that offer visa-on-arrival can have conditions: minimum bank balances, proof of onward travel, or specific entry points only.
Research visa requirements through the official embassy website of your destination country, or through the U.S. State Department’s country information pages. Third-party visa services (iVisa, VisaHQ) work well for simpler cases and save paperwork headaches. Budget 2–4 weeks for processing anything that isn’t instant.
3. Apply for TSA PreCheck or Global Entry
If you don’t have these yet, this is the task with the biggest quality-of-life payoff. TSA PreCheck costs $85 for 5 years and lets you keep your shoes on, your laptop in the bag, and your liquids packed — all in a dedicated security lane that moves dramatically faster than general screening.
Global Entry is $100 for 5 years and includes TSA PreCheck automatically. It adds expedited U.S. Customs screening when you return from abroad, which can save 45+ minutes at busy international airports. The in-person interview requirement means you need to apply well in advance — enrollment centers are busy and wait times are real. Some credit cards reimburse the application fee.
4. Vaccinations and Travel Health
This step gets skipped more than any other, and it’s the one with the longest lead time. Some travel vaccines (typhoid, hepatitis A, yellow fever) require multiple doses spaced weeks apart. Others (malaria prevention medication) need to start before you arrive in-country.
Schedule a travel medicine appointment at least 6 weeks out. Your regular doctor can handle basic vaccines, but a dedicated travel clinic has depth on regional disease risks, altitude, water safety, and region-specific medication recommendations. The CDC’s Traveler’s Health website by destination is the best starting resource.
Beyond vaccines: think about prescription medications you might need. Carry enough for the full trip plus a buffer. Bring a written prescription and keep medications in their original packaging to avoid questions at customs.
5. Book Travel Insurance
Travel insurance is the item most people add to their list and then quietly skip. Medical coverage is the critical part — a serious injury or illness abroad can generate hospital bills that would genuinely wreck a financial plan. Emergency medical evacuation costs are especially brutal.
Look at World Nomads, SafetyWing, or Allianz for comprehensive plans. If you have a travel credit card with trip protection, read the actual terms — some policies are robust, others are nearly useless. For longer trips or adventure destinations, buy a standalone policy.
2–4 Weeks Before Departure: Logistics and Gear
6. Sort Out Your Money Strategy
Don’t show up in a foreign country with only your regular debit card. Standard debit cards charge foreign transaction fees (usually 1–3%) plus a separate ATM fee on top. Multiply those by a week of daily withdrawals and it adds up.
A Charles Schwab checking account reimburses all ATM fees worldwide. A Wise card offers near-interbank exchange rates. A travel credit card with no foreign transaction fees handles most point-of-sale purchases. You want a layered approach: one card for daily spending, another for backup, and local cash for the first 24 hours so you’re not scrambling for an ATM after a long flight.
Notify your existing bank and credit card companies of your travel dates and destinations. Nothing kills a trip faster than a frozen card at dinner on night one.
7. Plan Your Phone and Data Situation
International roaming on your carrier plan works fine for occasional use, but the daily fees stack up fast on a longer trip. Three options worth knowing:
- eSIM: The cleanest option if your phone supports it (iPhone XS and newer, most recent Android flagships). Buy a destination eSIM through Airalo or Holafly before you leave, activate it on arrival, and you’re connected. No SIM card to lose, no waiting in a carrier shop at the airport.
- Local SIM: Buy a physical SIM card at your destination airport or a local phone shop. Cheaper per GB than eSIMs in most countries, but requires an unlocked phone and a bit of setup friction.
- International Plan Add-On: T-Mobile and Google Fi include international data by default. Other carriers sell daily add-ons. Convenient but usually more expensive for heavy data use.
Download offline maps for your destination in Google Maps or Maps.me before you leave — a must for the gap between landing and activating your data connection.
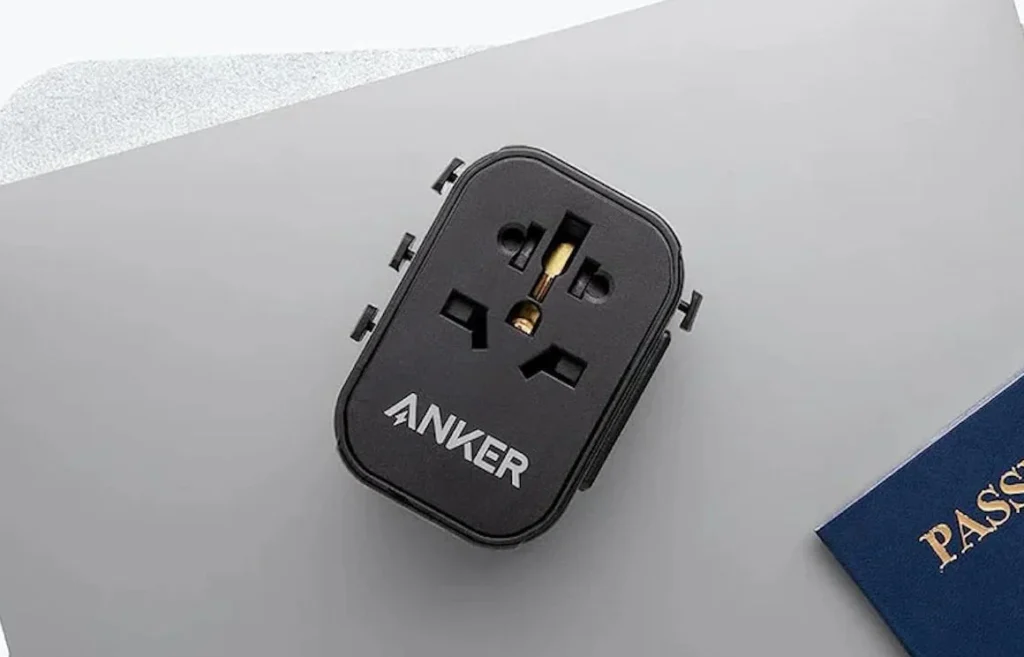
8. Buy the Right Travel Adapter
Outlet shapes and voltages are different in almost every region. A single universal travel adapter handles this. The ones worth buying have USB-A and USB-C ports built in so you can charge multiple devices from a single outlet — critical in hotels where usable outlets near the bed are rare.
We’ve tested a lot of these. The EPICKA Universal Travel Adapter covers outlets in 150+ countries and includes USB-C PD charging at up to 65W — enough to charge a laptop. If you’re going Europe-specific, the TESSAN European Travel Plug Adapter is a slimmer, cheaper option. See our full breakdown in our EPICKA Universal Travel Adapter review.
9. Get a Luggage Tracker
Checked bag? Put a tracker in it. Apple AirTags are the gold standard for iPhone users — they ride the massive Find My network and can be tracked down to a room when stationary. The Apple AirTag 4-Pack is the move if you want to cover multiple bags, a wallet, and a camera bag. Android users should look at the Samsung Galaxy SmartTag2, which runs on Samsung’s SmartThings network. We reviewed both extensively — see our AirTag review and SmartTag2 review.
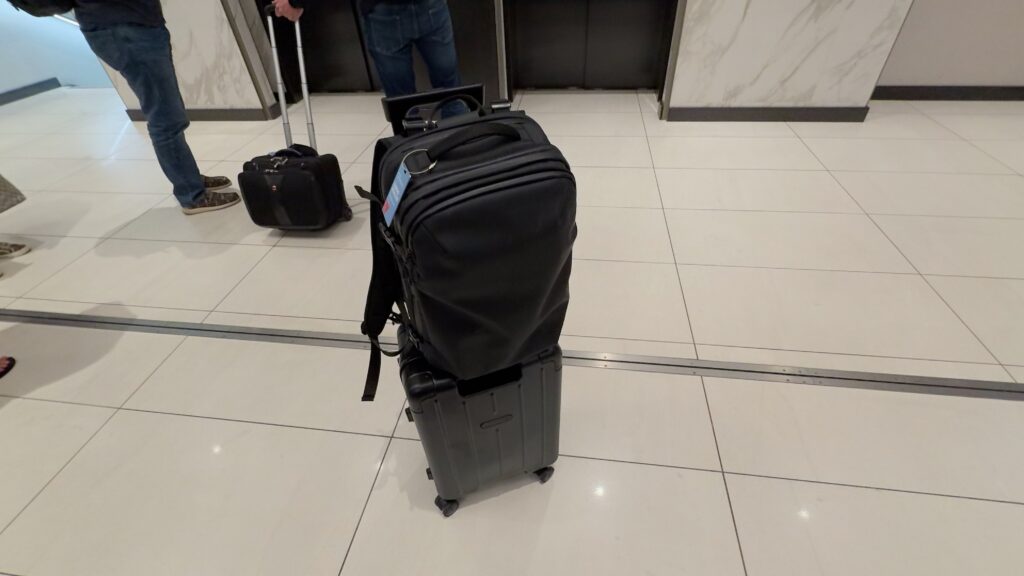
10. Sort Out Your Carry-On Strategy
This is the decision that shapes everything else about your packing. Are you checking a bag, or are you going carry-on only? Both have real trade-offs — and the right answer depends on trip length, destination, and how much you hate waiting at baggage claim.
If you’re going carry-on only, make sure your bag actually meets the size requirements of the specific airlines on your itinerary. Requirements vary — our guide to carry-on baggage size requirements by airline lays out the exact dimensions for major carriers. If you’re considering a backpack as your only bag, our best carry-on travel backpacks guide covers the top picks for every budget and use case.
If you’re checking a bag, invest in a digital luggage scale before you leave home. Checking your weight at the airport costs $75–150 per leg on most international carriers for overweight bags. Checking it at home costs nothing.
11. Protect Your Documents
RFID skimming — where someone with a scanner reads your passport or credit card chip without touching it — is a real enough threat in crowded tourist areas that it’s worth basic protection. An RFID-blocking passport holder or neck wallet costs under $20 and removes the risk entirely.
The HERO RFID Neck Wallet sits flat under your shirt and holds your passport, cards, and emergency cash securely. See our full neck wallet review and the Amazon Basics RFID passport holder review for a budget-friendly alternative.
Also: make photocopies of your passport, visa, travel insurance, and credit cards. Email scans to yourself. Store a set in your bag separate from the originals. This is a minor inconvenience that becomes a major lifeline if your documents go missing.
12. Register with the STEP Program
The Smart Traveler Enrollment Program (STEP) is a free State Department service that registers your trip with the nearest U.S. embassy. If there’s a natural disaster, civil unrest, or a family emergency back home, the embassy can locate and contact you. It takes 5 minutes at step.state.gov and is a standard move for any international trip.
The Packing Phase: 1–2 Weeks Out
13. Build Your Packing System
Packing cubes transform a chaotic bag into something organized and searchable. You’re not just compressing clothes — you’re creating categories so you can pull out exactly what you need without unpacking everything in a dim hotel room at midnight.
Compression packing cubes go further by reducing the volume of soft items by 30–50%. Our guide to the One-Bag Travel Philosophy covers the full system. For specific cube recommendations at different price points, see our BAGSMART Compression Packing Cubes review, our BAGAIL Compression Packing Cubes review, and our Peak Design Packing Cube review for the premium option.
14. Pack Your Toiletries Correctly
TSA rules on liquids (the 3-1-1 rule: containers of 3.4oz or less, in 1 quart-sized clear bag, 1 bag per person) apply to all carry-on bags. Most people know the rule but still end up having things confiscated because their full-size shampoo accidentally made it into the wrong bag.
The cleaner solution is silicone refillable travel bottles. Fill them from your full-size products at home, pack them in your quart bag, and refill at your destination if needed. We tested the 18-pack TSA-approved travel bottles and found them reliable — see our travel bottles review. A dedicated toiletry bag keeps the quart bag + all your other personal care items in one pullable unit — we like the Peak Design Small Wash Pouch for its weatherproof construction and clean layout.
15. Charge Everything and Pack Your Power Stack
Your power stack is one of the most important things you pack. Get it right once and it runs on autopilot for every trip after that. What it should include:
- Universal travel adapter with built-in USB-C PD (see above)
- Power bank: 10,000–20,000mAh with USB-C PD output. The Anker Zolo Power Bank is fast, reliable, and TSA-legal. For laptop power on the go, the Anker 25000mAh Laptop Power Bank is worth the extra weight. See our reviews: Anker Zolo review and Anker Laptop Power Bank review.
- Cable organizer: One small zippered pouch keeps cables, adapters, and accessories from turning your bag into a wire nest. The BAGSMART Travel Case does this well at a low price point — see our BAGSMART Cord Organizer review.
For digital nomads or remote workers adding this to a longer trip setup, our Digital Nomad Tech Stack guide goes deep on the full kit.
16. First Aid and Medications
International pharmacies can be hard to navigate when you’re sick in a country where you don’t speak the language. Having a compact first aid kit and basic OTC medications with you means not hunting for ibuprofen in a strange city at 2am.
Pack: pain reliever, antihistamine, anti-diarrheal (traveler’s GI issues are common), antacid, blister treatment, bandages, and antiseptic wipes. The Thrive Mini First Aid Kit covers the core bases in a genuinely compact package — see our Thrive Mini First Aid Kit review.
17. Pack for Sleep
International travel means crossing time zones, and the flight itself rarely leaves you rested. A few items make the difference between arriving functional and arriving wrecked.
A quality neck pillow is worth it on a long haul. The Trtl Pillow is the most packable option and holds your neck at a proper angle rather than just cushioning it — see our Trtl Pillow review. For noise, a portable white noise machine like the SNOOZ Go handles thin hotel walls and noisy hostel dorms — see our SNOOZ Go review.
18. Check Your Flight Luggage Allowance One More Time
Airlines change their baggage policies, and booking class matters. What you were allowed on your last trip with the same carrier may not apply to the ticket you bought this time. Log into your reservation and confirm: carry-on dimensions, personal item allowance, checked bag allowance and weight limits, and any oversize or overweight fees.
Then use that luggage scale to confirm your packed bag weight before you get to the check-in counter.
48 Hours Before Departure: Final Confirmations
19. Check In Online
Most airlines open online check-in 24 hours before departure. Do it. You’ll get better seat options, confirm your flight is operating normally, and have your boarding pass on your phone — no scrambling at a kiosk with a checked bag hanging off your shoulder.
If you’re a frequent flyer, this is also when to confirm your status benefits (priority boarding, lounge access, upgrade eligibility) are attached to the correct booking.
20. Download What You Need Offline
Assume you will have no data for some portion of your trip. Download before you leave:
- Offline maps (Google Maps offline areas, or Maps.me)
- Your destination’s public transit app (many have offline timetables)
- Google Translate language packs (works offline once downloaded)
- Entertainment for the flight (movies, podcasts, playlists)
- Your hotel confirmation, flight details, and key addresses in a note app or printed
21. Charge Everything
The night before departure: phone, laptop, wireless earbuds, power bank, camera, smart watch, AirTag batteries (check them). A dead device at the airport is a minor annoyance. A dead device at a foreign airport in a city where you don’t speak the language is a real problem.
22. Confirm Ground Transportation at Both Ends
How are you getting from the departure airport to your hotel? How are you getting from the arrival airport? If the answer is “I’ll figure it out when I land,” that’s fine for some cities and genuinely stressful in others. International arrivals halls at major airports are chaotic. Pre-booked transportation — a hotel shuttle, a reserved airport taxi, or a confirmed Uber/Grab/Bolt account with the app downloaded — removes one variable from an already high-stimulus situation.
23. Confirm Your Accommodation
Call or message your hotel/Airbnb/hostel to confirm the reservation. Not because booking platforms are unreliable, but because you want to know the check-in process, whether there are any issues with your room, and that someone is expecting you. International bookings sometimes have separate processes from domestic stays — advance deposits, local taxes paid on arrival, or ID registration requirements.
24. Know the Local Emergency Numbers
911 does not work everywhere. In the EU, the emergency number is 112. In the UK, 999. Japan, 110 (police) or 119 (fire/ambulance). Most countries have distinct numbers for police, fire, and medical emergency. Save these in your phone. Take a screenshot. Know where the nearest hospital is to your accommodation. Odds are good you’ll never need any of this — but knowing it costs nothing.

At the Airport: The Day-Of Checklist
25. Arrive Earlier Than You Think You Need To
For international flights, the standard advice is 3 hours before departure. Take it. International check-in lines are longer, security screening is more thorough, and international gates are often the furthest from the terminal entrance. Even with TSA PreCheck or Global Entry, give yourself the time.
26. Know What’s In Your Carry-On Before Security
Liquids in the quart bag, ready to pull out. Laptop out of the bag (unless you have PreCheck). No forgotten full-size products that got mixed in during repacking. Running through security with a well-organized bag is fast. Doing it while scrambling to pull things out of a stuffed, disorganized carry-on while people queue up behind you is not.
For flight comfort tips including neck pillows, foot rests, phone mounts, and Bluetooth audio adapters for in-flight entertainment, see our guide to carry-on only travel essentials.
The Complete International Travel Checklist at a Glance
| Timeline | Task | Done? |
|---|---|---|
| 6+ Weeks Out | Verify passport validity (6-month rule) | ☐ |
| Research and apply for any required visas | ☐ | |
| Apply for TSA PreCheck / Global Entry | ☐ | |
| Book travel medicine appointment | ☐ | |
| Purchase travel insurance | ☐ | |
| 2–4 Weeks Out | Set up no-fee international banking/cards | ☐ |
| Arrange international phone plan or eSIM | ☐ | |
| Buy universal travel adapter | ☐ | |
| Get a luggage tracker (AirTag / SmartTag) | ☐ | |
| Confirm carry-on bag dimensions vs. airline | ☐ | |
| Buy RFID passport holder or neck wallet | ☐ | |
| Register with STEP program | ☐ | |
| 1–2 Weeks Out | Pack with compression packing cubes | ☐ |
| Fill and pack TSA-compliant toiletry bottles | ☐ | |
| Assemble and test power stack | ☐ | |
| Pack first aid kit and medications | ☐ | |
| Pack sleep comfort items | ☐ | |
| Weigh luggage with digital scale | ☐ | |
| 48 Hours Out | Check in online and save boarding pass | ☐ |
| Download offline maps, translate packs, entertainment | ☐ | |
| Charge all devices and power banks | ☐ | |
| Confirm ground transportation at both airports | ☐ | |
| Confirm accommodation reservation | ☐ | |
| Save local emergency numbers | ☐ | |
| Day Of | Arrive 3 hours early for international flights | ☐ |
| Liquids bag and laptop accessible for security | ☐ |
Frequently Asked Questions
How early should I apply for a passport before an international trip?
At minimum, 8–10 weeks if you need a new passport or renewal. Expedited service can get it done in 2–3 weeks at extra cost. If your passport is valid but expires within 6 months of your return date, many countries will deny you entry — check the specific rules for your destination.
Is TSA PreCheck worth it for international travel?
Yes, on the U.S. side of your trip. PreCheck speeds up departure security significantly. Global Entry is the better value at $100 since it includes PreCheck and adds expedited re-entry to the U.S. at international airports — worth it if you travel internationally more than once a year.
What’s the best way to carry money internationally?
A layered approach: a no-fee international debit card (Charles Schwab) for ATM withdrawals, a no-foreign-transaction-fee credit card for purchases, and a small amount of local currency for the first 24 hours. Avoid airport currency exchange counters — the rates are poor. Use local ATMs instead.
What travel vaccines do I need?
It depends entirely on your destination and your existing vaccination history. Consult a travel medicine clinic or your doctor at least 6 weeks before departure. The CDC Traveler’s Health pages for your specific destination are the most reliable starting point for understanding what’s recommended vs. required.
What if I lose my passport abroad?
Contact the nearest U.S. embassy or consulate immediately. This is why the STEP program registration matters — the embassy already knows you’re in the country. Carry a photocopy of your passport data page in a separate location from the original, and have a scanned copy emailed to yourself for reference.
Final Thoughts
International travel has a lot of moving parts, but none of them are complicated in isolation. The issue is that they cluster — visa processing, passport validity, vaccine schedules, travel insurance purchase windows — and missing one can cascade into real problems. Working through this checklist 6+ weeks out gives you the runway to handle everything without rushing.
Do the unglamorous prep work early, pack smart, and by the time you’re at the gate, there’s nothing left to worry about. That’s the point.
For more on building the right gear setup for international travel, start with our guides on one-bag travel, the ultimate carry-on packing guide, and the honest breakdown of which travel items are actually worth buying.