

1. Introduction: The Evolution of the Hybrid Creator
The paradigm of travel photography has shifted seismically in the last half-decade. We have moved from the era of the dedicated specialist—the photographer with their strobe kit or the videographer with their shoulder-rigged betacam—to the era of the hybrid creator. Today’s adventure content creator is expected to deliver high-resolution stills for Instagram, 4K 10-bit 4:2:2 video for YouTube, and vertical short-form content for TikTok, often simultaneously and without a support crew. This operational reality demands a fundamental rethinking of equipment carriage, protection, and deployment.
The “Pack & Protect” philosophy is not merely about preventing lenses from breaking; it is about workflow efficiency. A camera buried in a roll-top bag during a fleeting sunset is effectively useless. Conversely, a camera clipped to a backpack strap during a torrential downpour or a scramble up a scree slope is a liability. The modern adventure filmmaker must balance these opposing forces: Accessibility (speed of draw) versus Security (protection from impact, elements, and theft).
This report serves as a comprehensive technical dossier for the professional and aspiring travel creator. It analyzes the structural integrity of carrying systems, the metallurgy of quick-release clips, the photon efficiency of portable lighting, and the logistics of international air travel with high-value lithium-ion powered gear. We will deconstruct the gear loadouts of industry leaders, examine the failure points of popular equipment, and provide a definitive guide to building a kit that survives the journey.
2. The Vessel: Advanced Camera Bag Analysis
The primary line of defense for any adventure photographer is the bag. However, the market is saturated with “camera bags” that prioritize aesthetics over ergonomics or protection over accessibility. For the adventure YouTuber, a bag must function as a mobile studio, a hiking pack, and a secure vault.
2.1 The Structural Dilemma: Access Points and Workflow
The architecture of a camera bag dictates the rhythm of the shoot. We categorize bags primarily by their access mechanism, each of which serves a specific operational doctrine.
2.1.1 Rear-Access Clamshell: The Security Standard
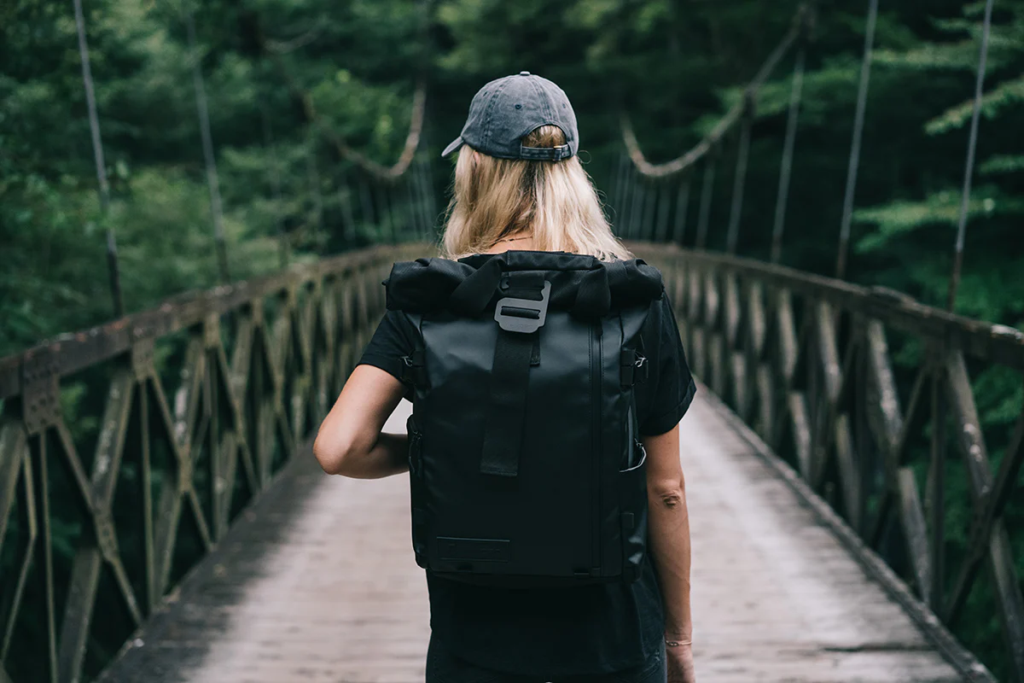
Rear-access bags, where the main compartment opens from the panel resting against the user’s back, have become the gold standard for adventure travel.
- Security: When worn, the zipper is physically inaccessible to pickpockets. In crowded transit hubs like Rome Termini or the Paris Metro, this feature is passive theft prevention.
- Field Hygiene: To access gear in the wild, the user must place the bag face-down. This means the harness system (shoulder straps and back panel) remains facing up, keeping mud, snow, and sand off the points of contact. When the user puts the bag back on, they are not transferring debris to their clothing.
- Visibility: The clamshell design allows for a complete visual audit of the kit. A filmmaker can see every lens, battery, and filter simultaneously, reducing the “did I pack that?” anxiety.
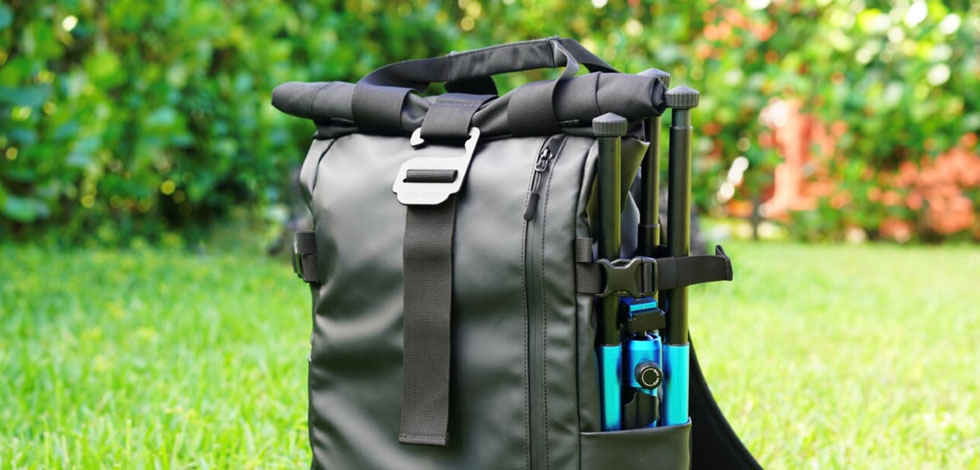
2.1.2 Roll-Top: The Expandable Silo
Roll-top bags (e.g., Wandrd PRVKE) borrow from dry-bag technology used in kayaking.
- Volume Flexibility: The defining advantage is variable capacity. A 31L bag can expand to 36L to accommodate a drone, a jacket, or groceries. This is crucial for “One-Bag” travel where non-camera essentials fluctuate.
- The “Black Hole” Failure Mode: The disadvantage is vertical stacking. Gear at the bottom of the roll-top section is inaccessible without removing the items above it. This makes roll-tops poor choices for critical, time-sensitive gear, though excellent for personal items.
2.1.3 Side Access: The Run-and-Gun Swing
Side access allows the user to swing the backpack onto one shoulder and draw the camera without removing the pack.
- Speed: This is the fastest deployment method short of a belt clip. For street photography or documenting spontaneous events, this speed is vital.
- Structural Weakness: The zipper on the side is a structural weak point and a potential entry for water. It also interrupts the placement of water bottle pockets or tripod mounts on that side of the bag.
2.2 Deep Dive: Top-Tier Bag Analysis
The Technical Hiker’s Choice: Shimoda Action X Series (X30/X40/X50)
The Shimoda Action X series is designed for creators who face genuine physical exertion—skiing, alpine climbing, or long-distance trekking. It bridges the gap between a technical mountaineering pack and a camera bag.
- Suspension System: Unlike urban camera bags which often rely on simple foam straps, the Shimoda features an adjustable torso height system. This allows users to move the shoulder straps up or down to align the hip belt correctly with the iliac crest, transferring load from the shoulders to the hips. For loadouts exceeding 12kg, this is non-negotiable for spinal health.
- Modular Core Units: Shimoda uses removable “Core Units” (padded inserts). A user can swap a “Large Mirrorless” core for a “Small” one, freeing up internal volume for camping gear. This modularity allows the bag to transition from a pure camera hauler to an overnight camping pack.
- Material Science: The exterior is constructed from high-tenacity nylon with Carbonate Ether resin coating. This provides extreme abrasion resistance and weatherproofing without the need for a rain cover in light to moderate precipitation.
- Critique: The bag is heavy even when empty (approx. 2.5kg for the X30). It is also visually technical, which makes it conspicuous in formal or urban settings.
- Recommendation: Shimoda Action X39
The Urban Creative’s Choice: Wandrd PRVKE (21L/31L)
The Wandrd PRVKE has achieved cult status among YouTubers for its fusion of style and utility. It does not look like a camera bag, which is a significant “Grey Man” security feature.
- Material: Built from waterproof tarpaulin and ballistic nylon. It is practically impervious to rain. The material is stiff, holding its shape even when empty, providing a protective shell.
- Tri-Access System: It offers roll-top access for personal gear, a side-draw pocket for the camera, and a full clamshell opening for organization. This hybrid approach covers most use cases.
- Ergonomics: While improved in the V2 and V3 models, the shoulder straps lack the plush thickness and load-lifter capabilities of the Shimoda. The back panel is flatter, leading to less ventilation. It is comfortable for city travel but suboptimal for 8-hour hikes with full loads.
- The “Tech Pouch” Integration: The front pocket is tight. If the main compartment is overstuffed, the front pocket becomes almost unusable for bulky items, restricted to flat documents or filters.
- Recommendation: Wandrd PRVKE 31L
The Luxury Hybrid: Compagnon Element Backpack 30L
For creators who demand sustainable materials and a boutique aesthetic without sacrificing technical performance, the Compagnon Element is a pinnacle product.
- X-Pac Fabric: The shell is made from X-Pac, a dimensionally stable sailcloth laminate that is lighter, stronger, and more waterproof than standard nylon. It has a distinctive “diamond” pattern and a crinkly texture.
- The “Roll-Top” Innovation: Unlike standard roll-tops that require unbuckling and unrolling, the Element uses a clever zipper/magnet combination that allows for rapid, one-handed access to the top compartment while maintaining weather sealing.
- Interior Layout: The dividers are some of the most customizable in the industry, often including dedicated stash spots for small items like AirTags or batteries.
2.3 The Hard Case Alternative: Pelican vs. Nanuk
For air travel, or when working out of a vehicle, soft bags are insufficient. The hard case is the industry standard for checking gear or transporting cinema cameras.
| Feature | Pelican 1535 Air | Nanuk 935 |
| Weight | ~3.9 kg (Lighter) | ~5.3 kg (Heavier) |
| Latch System | Press & Pull (Standard) | PowerClaw (Superior) |
| Wheels | Standard | Polyurethane (Smoother) |
| Material | HPX² Polymer | NK-7 Resin |
| Use Case | Air Travel (Carry-on) | Road/Production |
- Pelican 1535 Air: The “Air” line reduced the weight of the classic 1510 by up to 40% using a proprietary HPX² polymer. This is critical for meeting strict carry-on weight limits (often 7kg or 10kg on international flights). It maximizes internal volume for the 22″x14″x9″ limit.
- Recommendation: Pelican 1535 Air TrekPak
- Nanuk 935: Canadian-made Nanuk cases are often favored for their “PowerClaw” latching system, which uses a two-step compression force to clamp the case shut. It is virtually impossible for these latches to pop open if dropped, a known (albeit rare) issue with older Pelican latches. The Nanuk is heavier, which can be a liability for flying, but its ruggedness is arguably superior for vehicle-based expeditions.
- Recommendation: Nanuk 935
2.4 The Stealth Alternative: Non-Camera Bags
A growing trend among professional travel photographers is to eschew dedicated camera bags entirely. High-end hiking packs (Osprey, Gregory) or travel packs (Bellroy, Aer) are often more comfortable and less conspicuous.
- The Camera Cube Method: By placing a Tenba BYOB or Peak Design Camera Cube inside a standard 40L travel backpack, the photographer gains the suspension comfort of a hiking pack with the protection of a camera bag.
- Security: A thief scanning a train station for “Lowepro” or “Manfrotto” logos will likely overlook a dirty Osprey hiking pack.
3. The Anchor: Accessible Carry Systems
The most protected camera is the one left in the hotel room. To get the shot, the camera must be accessible. The strap is the traditional solution, but for active movement, a swinging camera is a liability. This has given rise to the rigid clip system.
3.1 Peak Design Capture Clip V3: The Industry Standard
The Peak Design Capture Clip allows a camera to be rigidly mounted to a backpack strap or belt. It is machined from anodized aluminum and is low-profile and incredibly strong.
3.1.1 Engineering and Mechanics
The V3 consists of two parts: the Clip (which clamps to the strap) and the Plate (which screws into the camera).
- Locking: The plate slides into the clip and locks with an audible click. A safety lock can be rotated to prevent accidental release.
- Load Rating: Rated for 200 lbs (90 kg). The failure point is never the aluminum clip; it is the strap fabric or the camera’s tripod socket.
3.1.2 Critical Failure Modes and Mitigation
Despite its ubiquity, the Capture Clip has documented failure modes that users must manage.
- The Screw Loosening Phenomenon: The most catastrophic failure occurs when the bolts connecting the Arca plate to the camera body loosen due to micro-vibrations from hiking. If these screws back out, the camera falls.
- Case Evidence: User reports confirm instances of lenses shattering after the plate detached during a hike.
- Mitigation: Daily Torque Check. Do not rely on hand-tightening the screw with the fold-out handle or a coin. Use the provided hex key to torque the screw tight before every major outing.
- Strap Compression Failure: The clip uses two clamping bolts. On thick, padded straps (like Shimoda or Osprey), the standard bolts may be too short to engage sufficient threads.
- Mitigation: Use the Long Clamping Bolts (included or sold separately) for any strap thicker than a few millimeters. Compress the foam of the strap manually before threading the bolt to ensure deep thread engagement.
3.1.3 Ergonomics and Anatomy
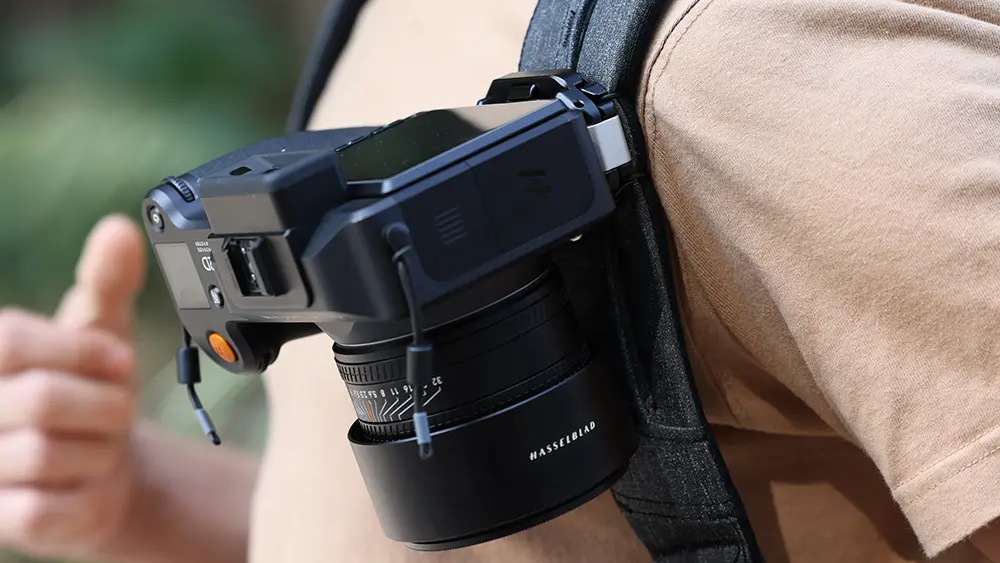
For many users, particularly women, the placement of a rigid metal block on the chest strap is uncomfortable or interferes with anatomy.
- The Pro Pad Solution: Peak Design manufactures a “Pro Pad” that allows the clip to be mounted on a belt in a “holster” style. This shifts the weight from the shoulder/chest to the hips, which is ergonomically superior for heavy setups (e.g., 70-200mm lenses) and solves the chest discomfort issue.
- Purchase Recommendation: Peak Design Clip
3.2 The Challenger: Ulanzi Falcam F38 Quick Release
The Ulanzi Falcam F38 system has emerged as a serious competitor, addressing some of the Peak Design’s workflow friction points.
- The “Push-Button” Release: Unlike the PD’s specific sliding mechanism, the F38 uses a rapid push-button release that some users find faster and more intuitive for one-handed operation.
- Ecosystem Integration: The F38 system is designed to live on the camera, the backpack strap, the tripod, and the gimbal. The plate is compatible with the Zhiyun Weebill and DJI Ronin gimbals directly in some configurations, eliminating the need to unscrew plates when balancing a stabilizer.
- Compatibility Warning: While the F38 system is ostensibly “Arca-Swiss compatible,” tolerances vary. The F38 plate fits into many Arca heads, but standard Arca plates (like Peak Design’s) do not fit into the F38 base. Once you commit to Falcam, you must convert your entire ecosystem (tripod heads, clips, gimbals) to F38 bases to see the benefit.
- Comparison Verdict:
- Peak Design V3: Best for rugged durability, minimalist profile, and those already invested in the PD Anchor ecosystem.
- Ulanzi Falcam F38: Best for “Hybrid Shooters” who constantly switch between backpack, tripod, and gimbal and prioritize speed over the lowest possible profile.
- Purchase Recommendation: Ulanzi Falcam F18 Quick Release
4. The Foundation: Travel Tripod Systems
A tripod is often the heaviest and most cumbersome item in a kit, yet for time-lapses, low-light landscapes, and self-filming, it is indispensable. The challenge is finding a support system that is stable enough to hold a $4,000 camera rig in the wind but light enough to hike with.
4.1 Carbon Fiber vs. Aluminum: The Material Science
- Carbon Fiber: Composite material consisting of woven carbon filaments in a resin matrix.
- Pros: Significantly lighter (20-30% weight savings). High stiffness. Vibration Damping: Carbon fiber absorbs micro-vibrations (from wind or shutter shock) much faster than metal.
- Cons: Expensive. Brittle under sharp impact (can crack if smashed against a rock).
- Aluminum:
- Pros: Cheaper. Dents rather than cracks (fail-safe).
- Cons: Heavy. Transmits vibration (“rings” like a bell). Cold to the touch in freezing conditions.
- Verdict: For adventure travel, Carbon Fiber is the only logical choice despite the cost. The weight savings directly correlate to endurance.
4.2 The “Zero Space” Revolution: Peak Design vs. Ulanzi
Peak Design Travel Tripod (Carbon Fiber)
Peak Design revolutionized tripod geometry by eliminating the “dead space” between cylindrical legs. Their legs are triangular/polygonal, allowing them to nest tightly together.
- Packed Volume: It collapses to the diameter of a water bottle. No other tripod packs this small for its height.
- The Ball Head Bottleneck: The integrated ball head is sleek but functionally limited for video. It has no fluid drag and leveling it requires adjusting legs, which is slow.
- Recommendation: Peak Design Travel Tripod
Ulanzi & Coman Zero Y / F38 Tripod
A direct competitor to Peak Design, offering a similar compact geometry but with features tailored to the video shooter.
- Integrated Leveling Base: The Zero Y features a center column with a built-in “half bowl” or leveling base. This allows the user to level the head by unlocking the column and tilting it up to 20 degrees, without adjusting the leg lengths. For video panning, this is a massive time-saver.
- Head Design: It often comes with the F38 quick-release head or a small fluid head, making it “video-ready” out of the box.
- Value: Generally retails for significantly less than the Peak Design Carbon Fiber model.
- Recommendation: Ulazi F38 Tripod
4.3 The Video Upgrade: Compact Fluid Heads
For adventure filmmakers, a ball head is insufficient for cinematic pans and tilts. The solution is to mount a compact fluid head on a travel set of legs.
- Top Pick: Manfrotto Befree Live Head (MVH400AH). It is small, lightweight, and offers genuine fluid drag on both pan and tilt axes.
- Integration: Many pros remove the center column of the Peak Design or Ulanzi tripod and mount this head (often using a universal adapter) to create the ultimate “Travel Cinema” support system.
5. The Sun in Your Pocket: Travel Lighting Protocols
Until recently, bringing “studio quality” light on an adventure trip was impossible. LED panels were bulky, and monolights required mains power. The introduction of high-output, compact COB (Chip-on-Board) LEDs has democratized cinematic lighting for the traveler.
5.1 The 60-Watt COB Revolution
A 60W COB light is powerful enough to act as a key light in a dim interior or a rim light in daylight. It is the sweet spot for travel.
Comparative Analysis: Amaran vs. Zhiyun
The Utilitarian: Amaran COB 60x S
- Specs: Bi-color (2700K-6500K). High color fidelity (CRI 96, TLCI 97, SSI D56 87).
- Form Factor: Boxy. Uses a standard Bowens mount (via adapter), making it compatible with cheap, universally available softboxes.
- Power: Includes a battery plate for dual NP-F batteries, widely available and cheap.
- Verdict: Best for “Production” travel where you might rent modifiers or need absolute color reliability matching other Aputure lights.
- Recommendation: Amaran COB 60x S
The Innovator: Zhiyun Molus X60 / G60
- Specs: Similar output to the Amaran, but in a radically different chassis.
- Form Factor: The Molus X60 is incredibly compact—roughly the size of a credit card (in profile) and thickness of a prime lens. It looks like a piece of vintage tech.
- Cooling: Uses “DynaVort” active cooling to dissipate heat from such a small body. Fan noise can be pitchy at 100% output.
- Power: Supports PD (Power Delivery) USB-C. This is a critical advantage. You can power this light with the same 100W Anker power bank you use for your laptop, eliminating the need for NP-F chargers and bricks.
- Verdict: Best for “One-Bag” travel vloggers where space is the ultimate constraint.
- Recommendation: Zhiyun Molus X60
5.2 Light Modifiers: Physics of Softness
A raw COB chip produces harsh, unflattering light. It must be diffused.
- The Lantern (e.g., Aputure Lantern, Zhiyun Lantern):
- Mechanism: A spherical diffuser that sprays light omnidirectionally (270 degrees).
- Use Case: “Lazy” lighting. Pop it open in a hotel room, boom it overhead, and it lifts the ambient light level of the entire space evenly. Perfect for vlogging or “walk-and-talk” scenes where specific control is secondary to general visibility.
- The Flat-Pack Softbox (e.g., Aputure Light Box 45×45):
- Mechanism: A square softbox with a front diffuser.
- Use Case: Interviews. It directs light forward, keeping it off the background. The key advantage of the 45×45 model is that it is a flat square when packed, sliding into a laptop sleeve, unlike traditional domes that bundle into thick cylinders.
- Recommendation: Aputure Lantern
5.3 Support: The Carbon Fiber Stand
Aluminum light stands are heavy and long. Brands like Ulanzi and Neewer now produce “reverse-folding” carbon fiber light stands.
- Specs: Fold down to ~19 inches. Weigh under 1.5 lbs. Extend to 6-7 feet.
- Stability Warning: They are extremely light. You must sandbag them (hang your backpack from the center column) or they will tip over if someone sneezes.
- Recommendation: Neewer Carbon Fiber Light Stand
6. Pack & Protect: Security and Logistics
Having the best gear is irrelevant if it is stolen in a hostel or destroyed by baggage handlers.
6.1 Air Travel Protocols: The Carry-On Imperative
The Golden Rule: High-value electronics and Lithium batteries never go in checked luggage.
- Lithium Regulations: FAA and EASA regulations prohibit loose lithium batteries in the hold due to fire risk. They must be in the cabin.
- The “Gate Check” Defense: On crowded flights, attendants may force you to gate-check your carry-on.
- Protocol: If this happens, you must immediately remove all lithium batteries, laptops, and cameras. Use the phrase: “I have loose lithium-ion batteries and fragile optics in this bag which are prohibited in the hold.” This often convinces them to find space for you. If not, you must have a “bail-out” tote bag ready to stuff your cameras into while the bag goes under.
6.2 The Cocoon Packing Technique
When using a non-camera bag or checking a tripod/grip bag:
- Core: The fragile item (lens) is wrapped in a dedicated “lens wrap” (padded velcro cloth) or neoprene pouch.
- Shell: This core is placed in the center of the bag.
- Insulation: Surround the core with soft layers—down jackets, socks, sweaters.
- Buffer: Ensure at least 2 inches of clothing buffer between the lens and the rigid walls of the suitcase. This creates a “crumple zone.”
6.3 Theft Prevention: The “Grey Man” Strategy
- Visual Camouflage: Thieves look for wealth indicators. A bag with “Sony” or “Canon” branding is a target. A rigid, black, boxy “Lowepro” bag screams “expensive gear.”
- Tactic: Use bags that look like gym bags or hiking packs. Use Gaffer Tape (black masking tape) to cover the logos on your camera and lenses. A taped-up camera looks broken and has low resale value to an opportunistic thief.
- Physical Lockdown:
- Pacsafe eXomesh: A stainless steel wire mesh net that wraps around the entire bag and locks to a fixture (bed frame, radiator). Ideal for leaving gear in a hotel room or hostel.
- Cable Ties/Carabiners: In pickpocket-prone areas (Barcelona, Paris), use locking carabiners or twist-ties to secure zipper pulls together. This stops the “unzip-and-grab” maneuver.
- AirTags: Place an Apple AirTag (with the speaker removed/disabled) deep inside the lining of your bag. If stolen, you can track it. Note: Removing the speaker prevents the “anti-stalking” chime from alerting the thief.
6.4 Insurance: The Safety Net
Standard travel insurance (World Nomads, etc.) is insufficient. It usually has a “per item limit” (e.g., $500) that won’t cover a single pro lens.
- Solution: Dedicated Camera Insurance (Inland Marine Policy) or a “Personal Articles Floater” added to your home/renters insurance.
- Providers: PPA (Professional Photographers of America) offers insurance with membership. TCP (Tom C. Pickard) and Hill & Usher are industry standards for pros.
- Coverage: Ensure it covers “Mysterious Disappearance” (you put it down, turned around, and it was gone) and “Accidental Damage” (you dropped it in the ocean).
7. Loadouts & Audience Analysis
Not every creator needs a cinema camera. We categorize setups based on technical proficiency and risk tolerance.
7.1 The “Run-and-Gun” Vlogger (Light Setup)
- Target: Solo travelers, TikTok/Reels creators, beginners.
- Philosophy: Speed and Zero Friction.
- Gear:
- Camera: iPhone 15/16 Pro (ProRes Log) or DJI Osmo Pocket 3.
- Audio: DJI Mic 2 (Wireless, 32-bit float internal recording).
- Support: SwitchPod or Joby GorillaPod 3K.
- Lighting: Aputure MC Pro (RGB Credit Card light).
- Bag: Bellroy Venture Sling 9L.
- Why: You can film anywhere, even in “No Camera” zones. Zero setup time.
7.2 The Hybrid Creator (Medium Setup – Recommended)
- Target: YouTubers, Adventure Photographers.
- Philosophy: Balance of quality and portability.
- Gear:
- Camera: Sony A7IV or Canon R6 Mark II.
- Lenses: 20-70mm f/4 (Sony) or 24-105mm f/4 (Canon) + 35mm f/1.8 Prime.
- Audio: Deity D3 Pro Shotgun + DJI Mic 2.
- Support: Ulanzi Zero Y Tripod + Peak Design Capture Clip V3.
- Lighting: Zhiyun Molus X60 Combo.
- Bag: Wandrd PRVKE 31L or Shimoda Action X30.
- Why: Professional 10-bit video and high-res RAW photos in a kit that can be hiked with for 15km.
7.3 The Documentary Pro (Advanced Setup)
- Target: Commercial filmmakers, DP on location.
- Philosophy: Image quality at all costs.
- Gear:
- Camera: Sony FX3/FX6 or Canon C70.
- Lenses: 24-70mm f/2.8 GM II + 70-200mm f/2.8 GM II.
- Audio: Sennheiser MKH-416 (Shotgun) + Zoom F3 Recorder (32-bit float).
- Support: Sachtler Flowtech 75 Tripod or Peak Design Carbon with Fluid Head.
- Lighting: 2x Amaran 60x S + Light Dome SE + Amaran T2c Tubes.
- Bag: Shimoda Action X50 + Pelican 1535 Air (Carry-on Roller).
- Why: Client demands. Requires logistical planning for transport (permits, carnet, excess baggage).
8. FAQ
Q: Can I carry a tripod on a plane as a carry-on?
A: Generally, yes. TSA and most Western security agencies allow tripods. However, interpretation varies by agent. Some international airlines (especially in Asia and Europe) may classify tripods as “blunt weapons” if they exceed a certain folded length.
- Best Practice: Strap the tripod to the side of your backpack or place it inside your carry-on if it fits. If challenged, be polite, but be prepared to gate-check it.
Q: Should I disconnect the lens from the body when traveling?
A: For air travel or rugged off-roading, YES. The lens mount is the weakest mechanical point of the camera system. A heavy lens acts as a lever; a sharp impact to the end of the lens can torque the mount, snapping it or warping the sensor flange distance. Cap both the body and lens and store them separately or “cocooned” in the bag.
Q: Is the Peak Design Capture Clip safe for heavy cameras?
A: It is safe (it won’t break), but it may not be comfortable. A full-frame body with a 24-70mm f/2.8 is roughly the limit for shoulder strap comfort. A 70-200mm f/2.8 will act as a pendulum and dig into your chest. For heavy setups, use the Pro Pad to mount the clip to your belt or backpack hip belt, shifting the load to your hips.
Q: Do I really need a dedicated “Camera Bag”?
A: No. In fact, many pros prefer not to use them. A high-quality hiking pack (Osprey, Deuter) combined with a Camera Cube (Tenba BYOB, Peak Design, Wandrd) is often more ergonomic, cheaper, and less conspicuous than a dedicated photo backpack. This “module” system allows you to leave the heavy camera gear at the hotel and use the backpack for a regular hike or city walk.
Q: How do I handle condensation when moving from cold AC to hot humidity?
A: This is a lens killer in the tropics. Moving from a 20°C hotel room to 35°C humid air causes instant fogging on internal glass elements.
- Solution: The Ziploc Trick. Before leaving the cold room, seal your camera and lenses inside a large airtight Ziploc bag (with as much air squeezed out as possible). Take the bag outside and let it sit in the sun for 20-30 minutes until the gear acclimates to the ambient temperature. Condensation will form on the bag, not the lens.
Safe travels, secure gear, and steady shots.